How to draw ...
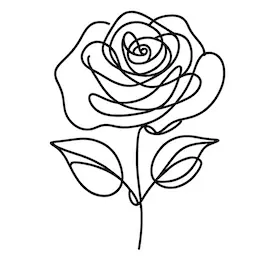
a rose
a rose is the top most searched thing that people want to draw and here is how it compares to other things in Nature > Plants.
But do people always want to draw a rose?
Interest over time on "how to draw a rose" in the U.S.
Cycle
The search volume data reveals an annual repetitive pattern with noticeable spikes occurring in the months of May. This could be linked to a specific yearly event or trend relevant to the keyword. In contrast, there's a clear dip in the summer months, specifically July and August.
And how does it compare to the most popular things to draw among Plants?


Interest over time on "how to draw a rose" comparing to top 3 in Plants category
data from Ahrefs Keyword ExplorerWhich countries are most interested in drawing a rose?
| United States | 🇺🇸 | 4,000 | |
| United Kingdom | 🇬🇧 | 600 | |
| India | 🇮🇳 | 500 | |
| Canada | 🇨🇦 | 250 | |
| Brazil | 🇧🇷 | 200 |
How to draw a rose step-by-step
Drawing a rose poses challenges due to its complex structure and varying petal arrangements, requiring a keen understanding of its form and symmetry. To capture its essence, artists often start with light sketches to map out the overall shape and build layers of detail gradually. Techniques such as shading and highlighting are essential for depicting the texture and depth of petals, while attention to light source helps in creating realistic contrast and dimension. Strategically focusing on the characteristically overlapping and spiraling nature of rose petals can aid in achieving an accurate and lifelike representation.
Here are the steps to drawing a rose:
- Outline the Basic Shape: Begin with an oval shape for the rose's head, tilted slightly to one side. This will form the base of your rose's structure. Draw this shape lightly in pencil as it will be a guideline. Below the oval, sketch a gently curving line to indicate the stem's direction.
- Create the Center Bud: Inside the top of the oval, draw a small circle to represent the rosebud at the center. Within this circle, sketch a spiral shape to illustrate the tightly wrapped petals of the rosebud. Keep these lines light and controlled.
- Form the Inner Petals: From the edges of the spiral, start drawing layered half-moon shapes to represent the inner petals. These petals should curl inwards at the edges, neatly cradling the center bud of the rose.
- Add the Outer Petals: Moving outward, depict the outer petals by drawing larger and more open petal shapes. These petals should have a gentle wave or curve at the edges, showcasing the full bloom of the rose. Make sure some petals appear to overlap others, adding depth.
- Detail the Petal Texture: Within each petal, draw faint lines radiating from where the petal joins the center bud toward the petal's edge. These lines suggest venation and help convey a realistic appearance for each petal. Vary your pencil pressure to create different shades and textures.
- Sketch the Stem and Thorns: Draw a sturdy, slightly curved line extending downward from the base of the rose to form the stem. Add small, triangular shapes along the stem to depict thorns, ensuring they are evenly spaced.
- Illustrate the Leaves: At the junction where the stem meets the flower, draw two or three leaves. These should be oval with pointed tips and have a serrated edge. Add a central vein to each leaf, with smaller veins branching off toward the edges.
- Refine and Erase Guidelines: Carefully go over your drawing, accentuating the important lines and shadows with a darker pencil or ink pen. Erase any unnecessary guidelines or sketch marks to clean up the drawing.
- Add Final Touches: Consider adding subtle shading to the underside of petals and leaves, enhancing the three-dimensional look. You may also introduce highlights to petals where they catch an imaginary light source.
Common mistakes
- Proportions: People often struggle with getting the relative sizes of the petals correct, leading to a rose that looks unbalanced.
- Petal Overlap: It's common to incorrectly layer the petals, resulting in a rose that appears flat instead of having a natural depth.
- Stem Details: The stem and leaves can be overly simplified or neglected, which detracts from the realism and detail of the drawing.