
How to draw ...
dreads
dreads is the 101th most searched thing that people want to draw and here is how it compares to other things in People > Expressions.
But do people always want to draw dreads?
Interest over time on "how to draw dreads" in the U.S.
Trend
There is a consistent upward trend in search volume for the term 'dreads' from January 2021 to May 2025, possibly linked to increasing cultural acceptance and interest in natural hairstyles over the years.
And how does it compare to the most popular things to draw among Expressions?

Interest over time on "how to draw dreads" comparing to top 3 in Expressions category
data from Ahrefs Keyword ExplorerWhich countries are most interested in drawing dreads?
| United States | 🇺🇸 | 81,000 | |
| Brazil | 🇧🇷 | 7,900 | |
| Canada | 🇨🇦 | 6,600 | |
| United Kingdom | 🇬🇧 | 5,800 | |
| Australia | 🇦🇺 | 3,000 |
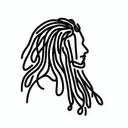
How to draw dreads step-by-step
The main challenges of drawing dreadlocks include capturing their complex textures, volume, and natural flow. Strategies for effectively representing dreads in art involve employing varied line weights and curves to depict individual strands realistically, using shading techniques to convey depth and movement, and focusing on how light interacts with the hair's twists and turns. Understanding the unique patterns and weight distribution of dreads is key to creating dynamic and lifelike illustrations.
Here are the steps to drawing dreads:
- Outline the Base Shape: Begin by sketching the head and the basic outline where the dreads will be, keeping in mind the direction and flow you want them to take. This will serve as a guideline for placing individual dreadlocks.
- Divide into Sections: Lightly draw lines to divide the hair into sections where the dreads will originate. These sections often start at the scalp and can be equal or varied in size, depending on the style you aim for.
- Sketch the Shape of Each Dread: For each section, draw long cylindrical shapes that represent the individual dreadlocks. Consider some dreads being thicker or thinner to add variety and a natural feel.
- Add Twists and Curves: To make the dreads look more realistic, add slight curves and twists along their length. These can be subtle S-shaped curves or more pronounced bends depending on the look you desire.
- Detail the Texture: Use short, curved, or zigzag lines along the dreads to create texture. This will mimic the interlocked strands of hair and give the dreads more dimension.
- Refine and Outline: Go over your initial sketches with a darker pencil or ink to solidify the lines you are satisfied with. Make sure the outlines are clear, especially where one dread overlaps or is behind another.
- Add Light and Shadow: Shade the dreads to give them a 3D appearance. Determine a light source and add shadows on the opposite side of each dread, while leaving highlights where the light would naturally hit.
- Final Touches: Erase any unnecessary guidelines and refine any lines or shading. Add any additional details or accessories, like beads or ties, to the dreads to enhance their appearance and individuality.
Common mistakes
- Unrealistic Thickness: People often draw dreads with uniform thickness, ignoring natural variations.
- Overlapping Confusion: Dreads are sometimes depicted as a tangled mess without clear separation or direction.
- Shiny Texture: Artists may mistakenly add excessive shine, making dreads appear like smooth, glossy surfaces rather than textured hair.